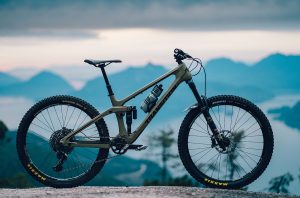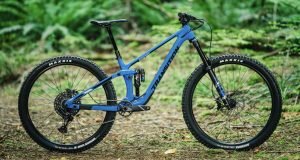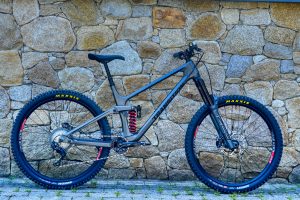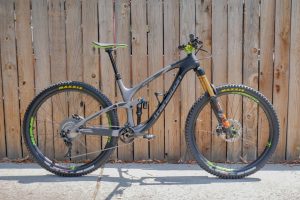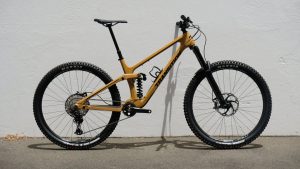
Raise mountain bike handlebars, Mountain biking is a popular activity enjoyed by people of all ages around the world. It provides a great opportunity for rigorous exercise and can even be pursued at a professional level. One important aspect of mountain biking is adjusting the handlebars to ensure a comfortable and efficient riding experience. In this article, we will guide you through the process of raising the handlebars on a mountain bike, discussing why it might be necessary and providing step-by-step instructions.
To raise the handlebars on a mountain bike:
Loosen the stem bolts using an Allen key.
Adjust the stem position upwards to the desired height.
Tighten the stem bolts securely to ensure stability.
Why You Might Need to Raise mountain bike handlebars
There are several reasons why you might need to adjust the handlebars on your mountain bike. Let’s explore some of the main motivations for making these adjustments:
1. Accommodating growth in children and teenagers
Children and teenagers grow rapidly, and their bike sizing can become obsolete within a short period. To ensure that the mountain bike remains suitable and comfortable for a child or teenager, it is recommended to adjust or raise the handlebars at least once a year. The frequency of adjustments may vary depending on the rate of growth.
2. Regifting or recycling the bike
If you plan to pass on your mountain bike to someone else, making a minor adjustment to the handlebars can ensure that the new rider has a comfortable and enjoyable riding experience. It’s a simple way to prepare the bike for its next owner.
3. Improving visibility
Maintaining good visibility while biking is crucial for safety. If your handlebars are too low, you may find yourself hunching over, which can limit your field of vision and increase the risk of accidents. By raising the handlebars to a comfortable height, you can enhance visibility and ride with confidence.
4. Ensuring comfort
Comfort is a key factor in enjoying your mountain biking experience. Riding with improperly adjusted handlebars can lead to aches, pains, cramps, and other discomforts caused by poor posture. Regularly adjusting your handlebars to the appropriate height and position can help prevent these issues and ensure a comfortable ride.
5. Reducing the likelihood of injury
Using a mountain bike with ill-fitting or improper handlebars increases the risk of injuries. Adjusting the handlebars to the correct height and width for your body can improve control and stability, minimizing the chances of
injuries caused by loss of control or sudden jolts. By raising the handlebars to a suitable position, you can enhance your bike’s maneuverability and reduce the likelihood of accidents or strain on your body.
6. Improving bicycle performance
Handlebar adjustment can also affect your bike’s performance. By finding the right handlebar height, you can achieve a better riding position that optimizes your power output and efficiency. This can lead to improved performance, especially when climbing, sprinting, or navigating challenging terrains.
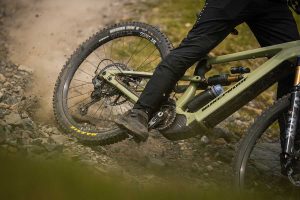
How to Raise mountain bike handlebars
Now that we understand the importance of handlebar adjustment, let’s dive into the process of raising the handlebars on a mountain bike. The method may vary depending on the type of handlebar setup your bike has.
1. Determining the type of mountain bike handlebar setup
First, identify whether your mountain bike has a threaded headset stem or a threadless headset stem. This will determine the specific steps you need to follow for handlebar adjustment.
2. Adjusting a mountain bike with a threaded headset stem
If your mountain bike has a threaded headset stem, follow these steps:
- Loosen the stem bolt on top of the stem using an Allen wrench or an adjustable wrench. This will allow you to raise or lower the stem.
- Gently lift the stem upwards to raise the handlebars. You may need to wiggle it slightly to loosen it if it’s stuck.
- Raise the stem to the desired height, ensuring that it aligns with the front wheel. Be careful not to exceed the maximum height limit marked on the stem.
- Tighten the stem bolt securely using the appropriate wrench. Ensure that the handlebars are stable and don’t move when you try to rotate or wiggle them.
3. Adjusting a mountain bike with a threadless headset stem
If your mountain bike has a threadless headset stem, follow these steps:
- Locate the top cap on the stem, which is usually positioned on the top of the headset.
- Loosen the top cap bolt using an Allen wrench. This will relieve the tension on the headset.
- Loosen the stem bolts on the sides of the stem using an Allen wrench. These bolts hold the stem onto the steerer tube.
- Gently lift the stem and handlebars together to raise them to the desired height. Make sure they align with the front wheel.
- Tighten the stem bolts securely, starting with the top bolt and then the side bolts. Alternate between the side bolts to ensure even tightening.
- Once the stem bolts are tightened, adjust the top cap bolt to eliminate any play or looseness in the headset. It should be snug but not overly tight.
4. Finding the perfect handlebar adjustment
After raising the handlebars, take your mountain bike for a test ride to determine if the height feels comfortable and suits your riding style. If necessary, you can make further adjustments by repeating the previous steps until you find the perfect position.
How Wide Should My Mountain Bike Handlebars Be?
Apart from adjusting the handlebar height, another important consideration is the handlebar width. The ideal handlebar width depends on various factors, including personal preferences, riding style, and location.
Factors to consider when choosing handlebar width:
- Personal preferences and riding style: Some riders prefer wider handlebars for enhanced stability and control, especially when riding downhill or on technical trails. Others may prefer narrower handlebars for improved aerodynamics and maneuverability.
- Location considerations: The type of terrain you ride on can also influence handlebar width. For tight and narrow trails, narrower handlebars may be more suitable to navigate through obstacles. In contrast, wider handlebars can provide better leverage and stability on open, fast descents.
To determine the ideal handlebar width for you, consider factors such as your body size, riding style, and the type of trails you frequently ride. If you’re unsure, it’s recommended to consult with a bike professional or try out different handlebar widths to find what feels most comfortable and suits your needs.
Remember that handlebar adjustment is a personal preference, and what works for one rider may not work for another. Take the time to experiment and find the optimal handlebar height and width that enhances your riding experience and keeps you comfortable and in control on your mountain bike adventures.
Additional Tips for Handlebar Adjustment
- Consider your riding posture: The handlebar height should promote a natural riding posture that allows you to maintain a relaxed and comfortable position. Your back should be slightly angled, and your arms should have a slight bend at the elbows. If you feel excessive strain on your neck, shoulders, or wrists while riding, it may be an indication that your handlebars need adjustment.
- Gradual adjustments: If you’re unsure about the ideal handlebar height, it’s recommended to make small incremental adjustments rather than drastically changing the position. This will allow you to assess the effects of each adjustment and fine-tune the height according to your preferences.
- Seek professional assistance if needed: If you’re new to mountain biking or feel unsure about adjusting the handlebars yourself, it’s advisable to visit a local bike shop or seek help from a professional bike mechanic. They can provide guidance, ensure proper alignment, and help you find the best handlebar position for your specific needs.
- Consider handlebar spacers: In some cases, raising the handlebars may require additional spacers to maintain proper headset and stem alignment. If you’re raising the handlebars significantly, it’s important to ensure that all components are properly adjusted and tightened to maintain safety and stability.
- Document your adjustments: Keeping track of the adjustments you make can be helpful for future reference. Note down the specific height or measurements of your handlebar position so that you can easily replicate or modify it later if needed.
Remember, handlebar adjustment is a personal process, and what works for one rider may not work for another. It’s important to listen to your body and make adjustments that enhance your comfort, control, and overall riding experience. Regularly reassessing your handlebar height and width is also beneficial as your riding style and preferences may evolve over time.
FAQs
How do I know if my handlebars are at the right height?
The right handlebar height is subjective and depends on your riding style and personal preference. However, a general guideline is to ensure that you have a comfortable riding position with a slight bend in your elbows and a relaxed posture. If you experience excessive strain or discomfort in your neck, shoulders, or wrists, it may be an indication that your handlebars need adjustment.
Can I adjust the handlebars on my bike myself, or should I seek professional help?
You can certainly make handlebar adjustments on your own, especially if you have basic knowledge of bike maintenance. However, if you’re uncertain or new to bike adjustments, it’s recommended to seek assistance from a professional bike mechanic. They can ensure proper alignment, help you find the ideal handlebar position, and make any necessary adjustments to maintain safety and stability.
How can I raise or lower my handlebars?
To raise or lower your handlebars, you’ll typically need to adjust the stem, which connects the handlebars to the bike’s fork. Loosen the stem bolts with an Allen key, and then adjust the stem position up or down as needed. Once you find the desired height, tighten the stem bolts securely. Remember to ensure that all components are properly aligned and tightened to maintain safety.
Can I adjust the handlebar width?
Yes, handlebar width can be adjusted by swapping out the handlebar itself. There are different handlebar widths available to suit different riding styles and preferences. Measure your shoulder width and consider your riding needs to determine if a wider or narrower handlebar would be more suitable. However, it’s recommended to consult with a bike shop or professional mechanic to ensure compatibility and proper installation.
How often should I reassess and adjust my handlebars?
It’s a good practice to periodically reassess and adjust your handlebars based on changes in your riding style, comfort, or preferences. Additionally, if you experience any discomfort or pain during rides, it may be worth experimenting with different handlebar positions. Regularly reviewing your handlebar height and width allows you to fine-tune your riding experience for optimal comfort and control.