Mountain biking enthusiasts are constantly seeking ways to enhance their riding experience, and one component that plays a pivotal role in this quest is the suspension system. Transition Sentinel, a favorite among trail riders, can be taken to new heights by embracing the coil shock setup. In this article, we’ll delve into the intricacies of coil shocks, why they are a game-changer for the Sentinel, and provide you with invaluable tips for an optimal setup.
Understanding Coil Shocks
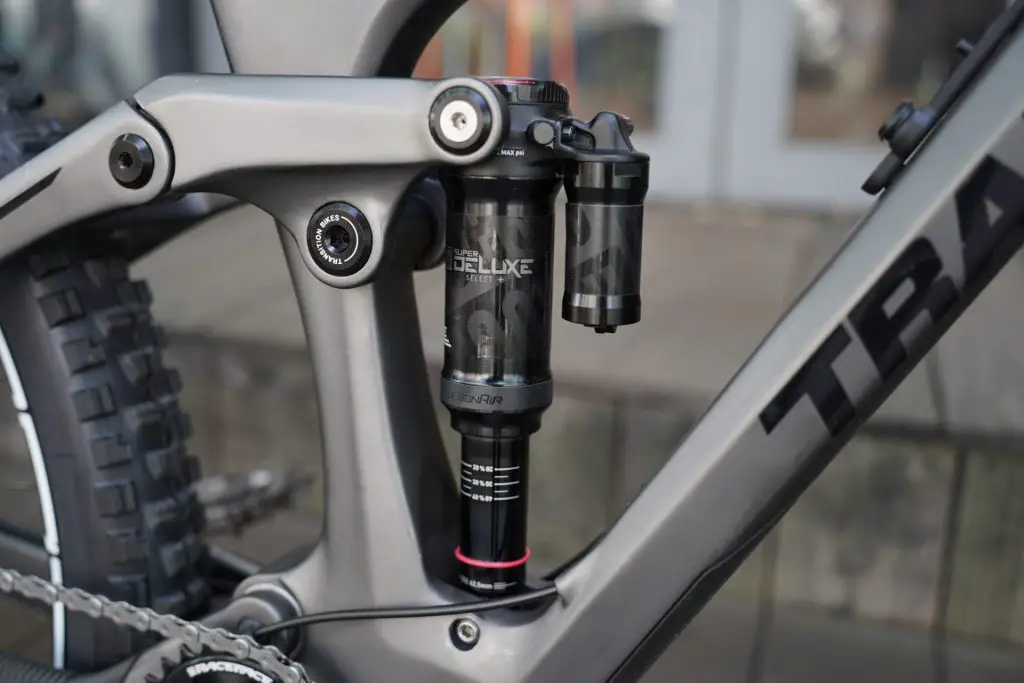
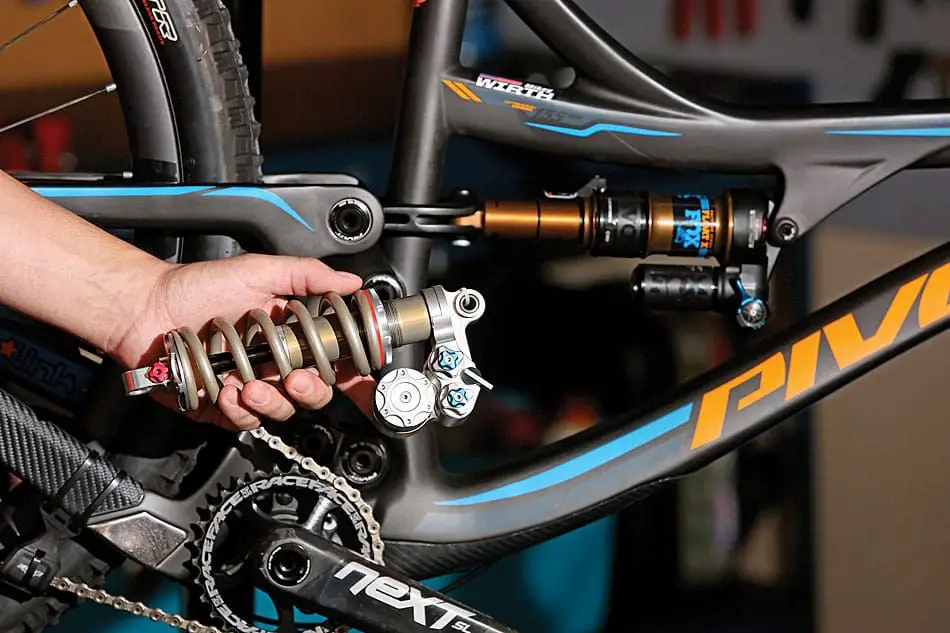
To appreciate the benefits of a coil shock setup, it’s crucial to understand how these shocks operate. Unlike air shocks, which use compressed air for suspension, coil shocks utilize a metal coil spring. The result is a more consistent and predictable response, providing riders with enhanced control and a smoother ride.
Transition Sentinel Overview
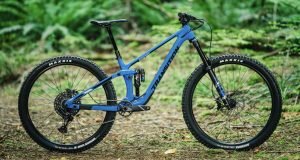
Before we dive into the specifics of coil shocks, let’s take a moment to appreciate the Transition Sentinel itself. Known for its versatility and capability on various terrains, the Sentinel’s performance can be further elevated with the right suspension setup. After all, a reliable suspension system is the heart of any mountain bike, especially one designed for challenging trails.
Specification
| Component | Specification |
|---|---|
| Frame | Aluminum alloy with a modern trail geometry |
| Suspension System | Compatible with both air and coil shocks |
| Coil Shock Option | Available as an aftermarket upgrade |
| Coil Shock Compatibility | Works with standard-sized coil shocks |
| Suspension Travel | 140mm (front) / 150mm (rear) |
| Wheel Size | 29 inches |
| Head Tube Angle | 65.5 degrees |
| Seat Tube Angle | 77 degrees |
| Bottom Bracket Height | 344mm |
| Chainstay Length | 433mm |
| Recommended Fork Travel | 150mm to 160mm |
| Drivetrain | 1x specific, compatible with various drivetrain options |
| Brake Compatibility | Post-mount disc brakes |
| Max Tire Clearance | 29 x 2.6 inches |
| Dropper Post Compatibility | Internal routing for a dropper post |
| Frame Protection | Downtube and chainstay protection included |
| Cable Routing | Internal cable routing for a clean look and protection |
| Weight | Varies based on frame size and components, approximately 14.5 to 15.5 kg (32 to 34 lbs) |
| Sizes Available | Small, Medium, Large, X-Large |
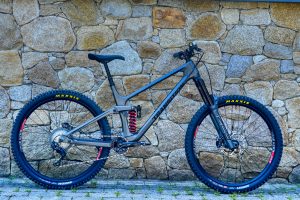
Why Choose Coil Shock for Sentinel?
The Transition Sentinel is engineered to accommodate both air and coil shocks. However, opting for a coil shock brings unique advantages to the table. The inherent sensitivity and responsiveness of coil shocks complement the Sentinel’s design, resulting in improved traction, better small bump compliance, and a more planted feel on descents.

Coil Shock Setup Basics
Getting the most out of your coil shock setup starts with selecting the right coil spring rate. Understanding your weight, riding style, and preferences is crucial in making this choice. Additionally, adjusting sag—a measure of how much the shock compresses under the rider’s weight—is vital for achieving optimal performance.
Fine-Tuning Rebound and Compression
Beyond the basics, fine-tuning rebound and compression settings is where riders can truly customize their experience. Achieving the right balance between rebound (how quickly the shock returns) and compression (resistance to compression) ensures a smooth and controlled ride tailored to individual preferences.
Addressing Common Myths About Coil Shocks
Before making the switch to a coil shock setup, it’s essential to dispel common myths surrounding them. Some riders believe coil shocks are heavy or lack adjustability. In reality, modern coil shocks are lightweight and offer a wide range of adjustments, making them suitable for various riding styles.
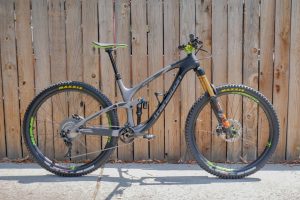
Real-World Performance Improvements
The proof is in the pudding, and many riders who have embraced the Transition Sentinel coil setup report significant improvements in performance. From increased stability on technical descents to improved traction on climbs, the real-world benefits are tangible and transformative.
Transition Sentinel Coil Setup Step-by-Step Guide
Now, let’s get practical. Here’s a step-by-step guide to setting up your Transition Sentinel with a coil shock. Following these instructions will ensure you extract the maximum potential from your bike, tailored to your unique riding style.
- Choose the Right Coil Spring Rate:
- Consider your weight, riding style, and terrain.
- Consult the manufacturer’s recommendations.
- Set the Sag:
- Aim for around 30% sag for optimal performance.
- Adjust preload to achieve the desired sag.
- Fine-Tune Rebound:
- Start with the rebound fully open.
- Gradually adjust to find the sweet spot for your preferences.
- Adjust Compression:
- Experiment with compression settings on different terrains.
- Find the balance between support and comfort.
- Test and Refine:
- Take your bike for a test ride on a variety of trails.
- Make small adjustments based on your experience.
Maintenance Tips for Coil Shocks
To ensure the longevity and reliability of your coil shock setup, regular maintenance is key. Perform the following checks and practices to keep your suspension in top-notch condition:
- Clean the Shock Regularly:
- Remove dirt and debris to prevent damage.
- Inspect for any signs of wear or oil leakage.
- Check Bolts and Fasteners:
- Ensure all bolts are properly tightened.
- Pay attention to pivot points and linkage.
- Monitor Coil Spring Wear:
- Inspect the coil spring for any signs of wear or damage.
- Replace if necessary to maintain performance.
Coil Shock vs. Air Shock: Choosing the Right Option
The eternal debate between coil shocks and air shocks continues. Each has its merits, and the choice depends on individual preferences and riding style. Consider factors like terrain, rider weight, and desired feel to make an informed decision.
Upgrading Your Transition Sentinel
For riders looking to take their Transition Sentinel to the next level, aftermarket options for coil shocks abound. Consider upgrading to a high-performance coil shock for further customization and an even more tailored riding experience.
Expert Insights and Recommendations
To provide additional perspective, we reached out to professional riders who swear by the Transition Sentinel coil setup. Their insights and recommended setups for different terrains can guide riders in fine-tuning their own configurations.
Transition Sentinel Coil Setup Video Tutorial
For those who prefer visual guidance, we’ve prepared a video tutorial demonstrating the Transition Sentinel coil setup process. Follow along to ensure a seamless and effective setup for your bike.
Conclusion
In embracing the coil shock for your Transition Sentinel, you’re not just upgrading a component; you’re unlocking the full potential of your mountain biking experience. The benefits in terms of control, traction, and overall ride quality are undeniable. So, why wait? Dive into the world of coil shocks and elevate your Transition Sentinel to new heights.

FAQs|Transition Sentinel Coil
Can I switch back to an air shock after trying a coil shock?
Yes, the Transition Sentinel is compatible with both air and coil shocks.
Do I need special tools to set up a coil shock on my bike?
While basic tools are sufficient, having a shock pump and a sag meter is recommended.
How often should I perform maintenance on my coil shock?
Regular cleaning and checks should be done every few rides, with a more thorough inspection annually.
Can I use a coil shock on any trail, or is it better suited for specific terrains?
Coil shocks can be used on a variety of trails, but adjustments may be needed based on terrain and riding style.
Will a coil shock make a significant difference for a beginner rider?
While beginners may not notice the nuances immediately, a well-tuned coil shock can enhance overall comfort and control.